
react-router入门
React-Router由社区维护并非官方发布的,有三个部分
- react-router 核心组件
- react-router-dom 应用于浏览器端的路由库(单独使用包含了react-router的核心部分)
- react-router-native 应用于native端的路由
所以我们就只需要引入react-router-dom就可以了
React-Router中主要有三部分,Router、Route和Link,Router用于管理Route,Route用来匹配组件,Link用来跳转Route,先来看一个简单的小示例
<Router>
  <ul>
    <li><Link to="/">首页</Link></li>
    <li><Link to="/list">列表</Link></li>
  </ul>
  <Route path="/" exact component={Index}/>
  <Route path="/list" component={List}/>
</Router>
Link用于跳转,在渲染时会被渲染成 <a href="/">首页</a>的样式
路由传参
路由传参大致分为两大类,一种是通过动态路由传参,一种是通过路由属性传递,就是params和query
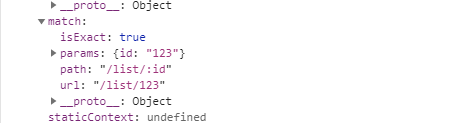
<Route path="/list/:id" component={List}/>
// 声明路由时定义接收的参数,然后在组件中通过props.match.params获取这个值
<Link to="/list/123">列表</Link>
// 这个link就可以命中路由,123也将作为params属性传递
// 还是上面的路由声明,将to做修改
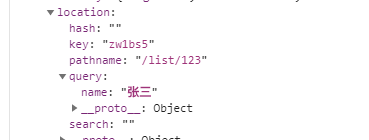
<Link to={{pathname: "/list/123", query: {name: '张三'}}}>列表</Link>
// pathname作为url路径,query将被携带到props.location.query中
嵌套路由
react的路由嵌套也很简单,就是在组件中再声明路由,比如一级路由中声明了一个/list路由,指向List组件,然后List组件中再声明/list/newslist路由指向子组件,就可以达到二级路由的效果
Switch组件
Switch用于只匹配一个组件,比如/about和/:user这两个路由,命中第一个就必定会命中第二个,这时候可以使用Switch将Route声明包裹,就只命中1个组件;此外还可以在所有的路由都不命中时显示404页面
<Switch>
    <Route exact path="/" component={Home}/>
  <Route path="/about" component={About}/>
    <Route component={NotFound}/>
</Switch>
Redirect组件
Redirect组件用于组件重定向,有两种方法来实现重定向
- 使用Redirect标签声明重定向
- 在构造函数中使用this.props.history.push()实现编程式重定向
例如可以在个人中心的页面中,通过判定是否登陆来重定向到登录页面
// 声明式(路由声明组件)
<Route exact path="/person" render={() => (
  '登录判定条件' ? (
    <Person />
  ) : (
    <Redirect to="/login"/>
  )
)}/>
// 编程式(个人中心组件)
constructor(props) {
  super(props);
  this.state = {}
  if ('未登录判定条件') {
    this.props.history.push('/login')
  }
}
react-router进阶
这种写法虽然能够运行,但是后期的维护成本太高,我们需要将路由尽可能的配置到一起,以减少后期的维护成本,我们可以将路由信息配置到一个数组中,然后通过map来遍历数组
function AppRouter() {
  let routes = [
    {
      path: '/',
      exact: true,
      component: Person
    },
    {
      path: '/list/:id',
      exact: false,
      component: InputList
    },
  ]
  return (<Router>
    <ul>
      <li><Link to="/">首页</Link></li>
      <li><Link to={{pathname: "/list/123", query: {name: '张三'}}}>列表</Link></li>
    </ul>
      {
        routes.map((item) => {
          return (<Route path={item.path} exact={item.exact} key={item.path} component={item.component}/>)
        })
      }
  </Router>)
}

export default AppRouter
虽然这样比起之前好了不少,但是还是达不到我们想要的效果
终极解决方案react-router-config
这里需要额外安装一个包react-router-config,安装完之后就可以开始配置路由了
新建一个router的js文件
export const routes = [
  {
    path: '/',
    exact: true,
    component: Person
  },
  {
    path: '/list/:id',
    component: InputList,
    routes: [
      {
        path: '/list/:id/h',
        component: News
      }
    ]
  }
]
然后修改AppRouter文件,将Route的map遍历声明改为{renderRoutes(routes)}
function AppRouter() {
  return <Router>
    <ul>
      <li><Link to="/">首页</Link></li>
      <li><Link to={{pathname: "/list/123", query: {name: '张三'}}}>列表</Link></li>
    </ul>
      {renderRoutes(routes)}
  </Router>
}

export default AppRouter
子路由也一样,在子组件中使用{renderRoutes(this.props.route.routes)}