Socket.IO前端后端一起拿捏
后端——Egg

环境搭建
后端socket使用Egg的周边——egg-socket.io
安装
运行命令安装
$ npm i egg-socket.io --save
配置
在plugin中开启插件
io: {
  enable: true,
  package: 'egg-socket.io',
},
在config中配置插件相关信息
// socket
config.io = {
  // init: { wsEngine: 'uws' },
  init: {}, // 默认ws
  namespace: { // 命名空间
    '/': {
      connectionMiddleware: [ 'connection' ], // 连接中间件
      packetMiddleware: [ 'filter' ], // 数据包中间件
    },
  },
};
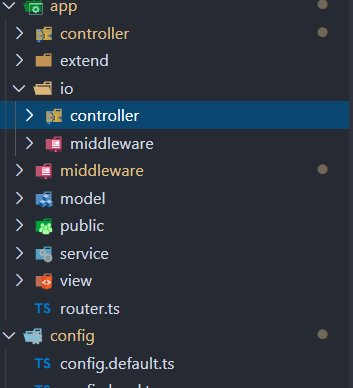
目录结构
编码
首先把刚才配置文件中的两个中间件编写完成
connection.ts
import { Context } from 'egg';
// 这个中间件的作用是提示用户连接与断开的,连接成功的消息发送到客户端,断开连接的消息在服务端打印
export default function connection(): any {
  return async (ctx: Context, next: () => Promise < any >) => {
    ctx.socket.emit('res', 'connected!');
    await next();
    // execute when disconnect.
    console.log('disconnection!');
  };
}
filter.ts
import { Context } from 'egg';
// 这个中间件的作用是将接收到的数据再发送给客户端
export default function filter(): any {
  return async (ctx: Context, next: () => Promise<any>) => {
    ctx.socket.emit('res', 'packet received!');
    console.log('packet:', ctx.packet);
    await next();
  };
}
然后配置路由,通过路由分发给controller处理
import { Application } from 'egg';

export default (app: Application) => {
  const { controller, router, middleware, io } = app;
  io.route('chat', io.controller.chat.index);
    // 这里需要注意route的两个参数,第一个参数要与第二个参数controller的文件名一致
    // 如果配置中有其他的命名空间‘/othername’,路由配置方法如下
    // io.of('/othername').route('default', io.controller.default.index);
};
注意,因为egg-socket.io中没有.d.ts,所以io会挂载不到app上,在下面的目录下添加代码即可
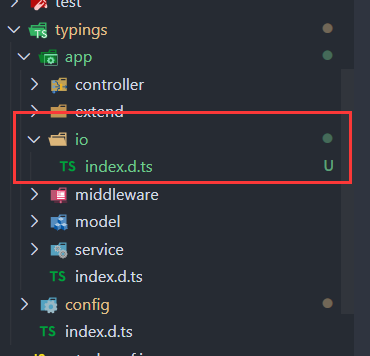
添加代码如下
import { Socket, Server } from 'socket.io';

declare module 'egg' {
  export interface Application {
    io: Serverr & EggSocketIO & Namespace;
  }

  export interface Context {
    socket: Socket
  }

  interface EggSocketIO {
    middleware: xxx;
    controller: xxx;
  }

  interface Namespace {
    route(event: string, handler: Function): any
  }
}
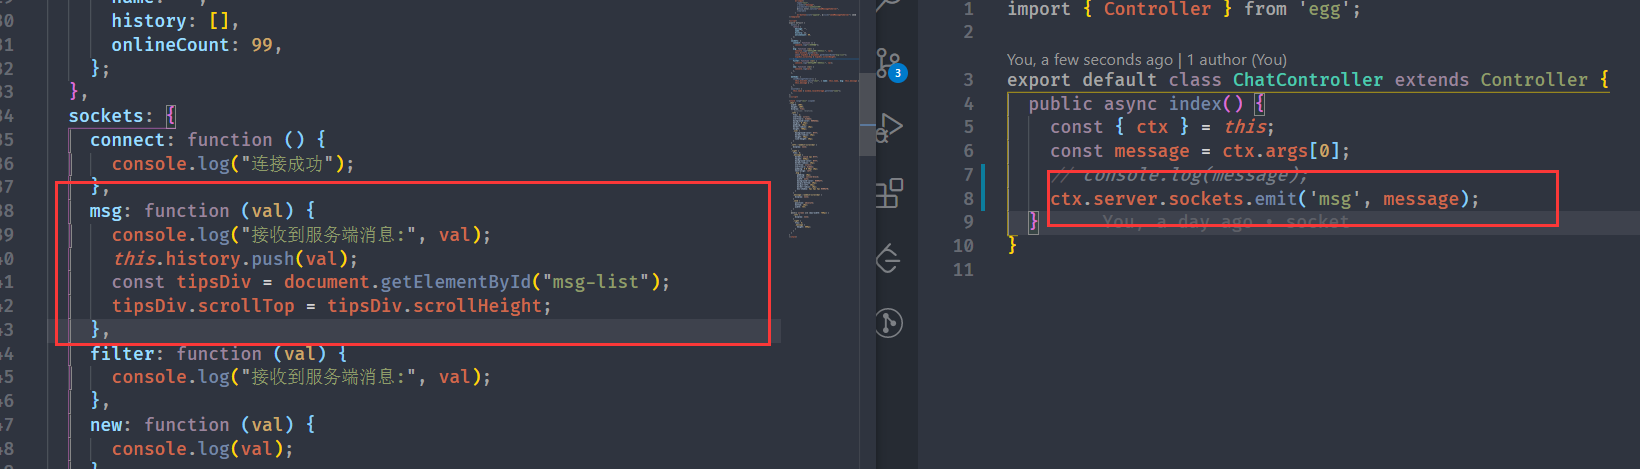
然后就是controller的代码了
import { Controller } from 'egg';

export default class ChatController extends Controller {
  public async index() {
    const { ctx } = this;
    const message = ctx.args[0];
    ctx.socket.emit('res', `Hi! I've got your message: ${message}`);
      // 这里可以调用service,只是示例就不搞辣么复杂了
  }
}
/*
// 在controller 中
// 发送给自己
this.socket.emit('eventName', 'value');
// 发送给除了自己外的所有人
this.socket.broadcast.emit('eventName', 'value');
// 发送给所有人,包括自己
this.server.sockets.emit('eventName', 'value');
*/
测试
代码写完然后使用socket.io-client测试一下连接(需要使用npm安装, npm install socket.io-client –save)
// eslint-disable-next-line @typescript-eslint/no-var-requires
const socket = require('socket.io-client')('http://127.0.0.1:7001/');

socket.on('connect', () => {
  console.log('connect!');
  socket.emit('chat', 'hello world!');
});

socket.on('res', msg => {
  console.log('res from server: %s!', msg);
});
然后node ./client.js
客户端运行结果如下
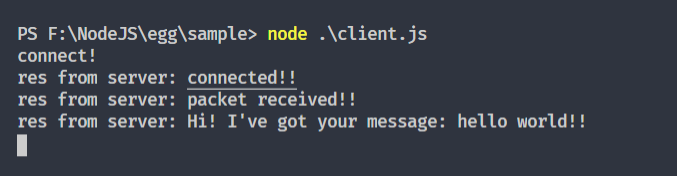
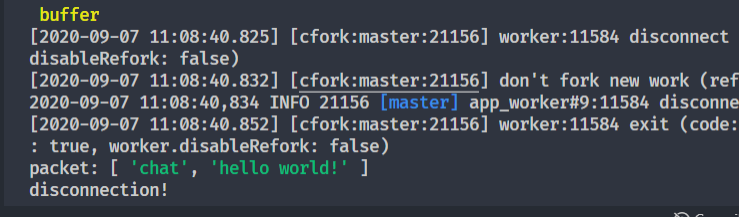
服务端结果如下(关闭服务端时触发中间件,打印了disconnection)
试了很多办法,一直没法用ws访问连接,只能通过socket.io-client跑通
代码
代码已经上传码云#socket
前端——Vue

前端使用vue-socket.io,这其实是对socket.io-client的封装,然后挂载到Vue实例
使用也是很简单,安装npm包
$ npm install vue-socket.io --save
然后配置main.js,将组件挂载到Vue实例
import Vue from 'vue'
import App from './App.vue'
import router from './router'
import store from './store'
import VueSocketIO from 'vue-socket.io'

Vue.config.productionTip = false

Vue.use(new VueSocketIO({
  debug: false, // 生产环境关闭
  connection: 'http://127.0.0.1:7001',
  vuex: {
    // store,
    // actionPrefix: 'SOCKET_',
    // mutationPrefix: 'SOCKET_'
  },
  // options: { path: "/my-app/" }
}))

new Vue({
  router,
  store,
  render: h => h(App)
}).$mount('#app')
然后新建一个page,这里只加了一个简单的按钮来触发事件
<template>
  <div>
    <button @click="sendMessageToServer">send</button>
  </div>
</template>

<script>
  export default {
    data() {
      return {
        msg: ''
      }
    },
    sockets: {
      connect: function () {
        console.log('连接成功');
      },
      res: function (val) {
      console.log('接收到服务端消息:', val);
      },
    },
    methods: {
      sendMessageToServer: function() {
        this.$socket.emit('chat', 'test111'); // 第一个参数决定了调用后端的哪个socket路由
      }
    }
  }
</script>

<style lang="less" scoped>

</style>
然后运行项目,查看效果
实战
先来看效果
东西就这么个东西,感觉没啥好说的,直接上代码吧,传送门
主要记一下过程中遇到的问题
给输入框添加回车事件时,第三方框架中不可以直接用
@keyup.enter,而是要用@keyup.enter.native后端在往前端发送消息时使用的主题是什么,前端就用什么主题接收,比如