
装饰器(Decorators)是一种特殊的语法,可以用于修改类、方法、属性等的行为或添加额外的元数据。
装饰器提供了一种扩展和定制类、方法和属性行为的机制,使得代码更加模块化、可维护和可复用。在 TypeScript 和 JavaScript 中,装饰器被广泛用于许多框架和库中,如 Angular、Express 等,以实现依赖注入、路由配置、日志记录等功能。
装饰器的名称来源于装饰器模式,装饰器模式是一种著名的设计模式,用于在运行时动态地给对象添加新的行为。该模式通过创建一个装饰器链,以包装原有对象,并灵活地组合和应用不同的装饰器,从而增强对象的功能。
之前也了解过装饰器,但是没有可以的研究过装饰器专题,最近想着想研究一下主流Web框架中的装饰器所以先来深入研究下装饰器。标题可以强调了TS中的装饰器,虽然装饰器时ES的语法,但是有些功能是TS中独有的。
各种装饰器
装饰器的本质是一个函数装饰器大致分为四种:
- 类装饰器(Class Decorators):应用于类声明之前,用于修改类的行为或添加额外的元数据。
- 方法装饰器(Method Decorators):应用于方法声明之前,用于修改方法的行为或添加额外的元数据。
- 属性装饰器(Property Decorators):应用于属性声明之前,用于修改属性的行为或添加额外的元数据。
- 参数装饰器(Parameter Decorators):应用于函数或方法的参数声明之前,用于修改参数的行为或添加额外的元数据。
下面就分别来看下这几个装饰器
类装饰器
类装饰器的类型签名如下
type ClassDecorator = <TFunction extends Function> (target: TFunction) => TFunction | void;
target 即要修饰的 class 类,如下
// classDecorator.ts
export function OnClass (target: Function) {
  console.log(target);
}

// main.ts
import { OnClass } from "./classDecorator.ts";

@OnClass
class Animal{
  name: string;

  constructor(name: string) {
    this.name = name;
  }
}

const animal = new Animal('Tom');
console.log(animal.name);
通过 ts-node 执行main.ts之后可以在控制台查看到输出结果,证明 target 参数就是我们修饰的class。

如果运行时出现报错
TypeError \[ERR_UNKNOWN_FILE_EXTENSION\]: Unknown file extension ".ts" for /xx/x.ts,可以在package.json中删除"type": "nodule",或者在tsconfig.json中添加如下配置{ "compilerOptions": { "esModuleInterop": true, } }然后使用ts-node-esm代替ts-node命令来运行ts文件。
此外类装饰器可以接收参数,但是值得注意的是需要确保装饰器表达式最终结果是一个函数。接收参数的形式如下:
import { OnClassWithParam } from "./classDecorator.ts";

@OnClassWithParam('Jerry')
class Animal{
  name: string;

  constructor(name: string) {
    this.name = name;
  }
}

const animal = new Animal('Tom');
console.log(animal.name);

// classDecorator.ts
export function OnClassWithParam(param: string) {
  console.log(param);
  return function (target: Function) {
    console.log( param, target);
  }
}
执行结果如下

如果要修改被装饰的类可以直接在装饰器返回,如下
function OnClass() {
  return function (target: { new (...args: any[]): {} }) {
    return class extends target {
      name = 'Tom';
    };
  }
}

@OnClass()
class Base {

}

const base = new Base()
// @ts-ignore
console.log(base.name); // Tom
要注意的是通过装饰器返回的类上的属性无法感知。
另外类装饰器可以叠加使用,像下面这样
@OnClassWithParam('Jerry')
@OnClassWithParam('Rita')
class Animal{
  name: string;

  constructor(name: string) {
    this.name = name;
  }
}

const animal = new Animal('Tom');
console.log(animal.name);
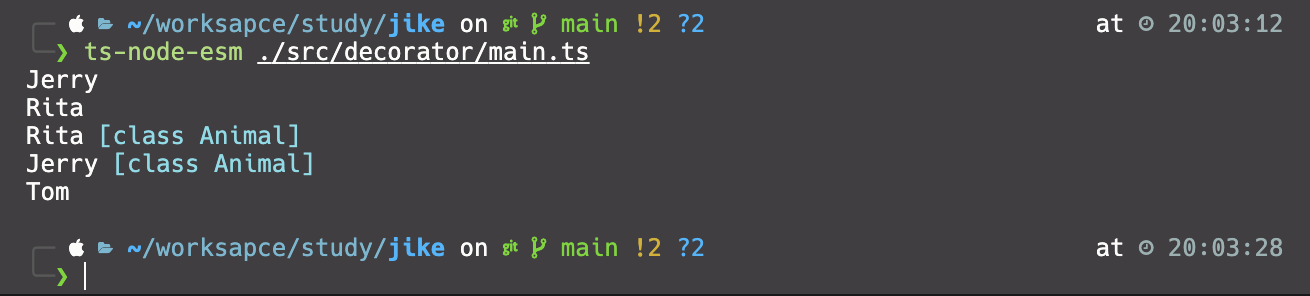
可以看出工厂函数的执行时从外向内,装饰器函数的执行则是由内向外。
至于应用场景,就看想象力了,有非常多的场景可以通过装饰器实现(但是注意,并不是所有的场景都适合装饰器),例如我们可以配合方法装饰器来实现下面的场景(方法装饰器后面会介绍)
import Koa from 'koa';
import Router from 'koa-router';
const app = new Koa();
const router = new Router();
// 定义一个类装饰器函数,用于自动注册路由
function route(prefix: string) {
return function (target: Function) {
const methods = Object.getOwnPropertyNames(target.prototype);
for (let method of methods) {
if (method !== 'constructor' && typeof target.prototype[method] === 'function') {
const path = `${prefix}${target.prototype[method].path}`;
const httpMethod = target.prototype[method].httpMethod.toLowerCase();
// @ts-ignore
router[httpMethod](path, target.prototype[method]);
}
}
};
}
// 路由方法装饰器,用于指定路径和 HTTP 方法
function get(path: string) {
// @ts-ignore
return function (target: any, key: string, descriptor: PropertyDescriptor) {
descriptor.value.path = path;
descriptor.value.httpMethod = 'GET';
return descriptor;
};
}
@route('/users')
export class UserController {
@get('/list')
async list(ctx: Koa.ParameterizedContext<any, Router.IRouterParamContext<any, {}>, any>) {
// 处理获取用户列表的逻辑
ctx.body = 'Get users';
}
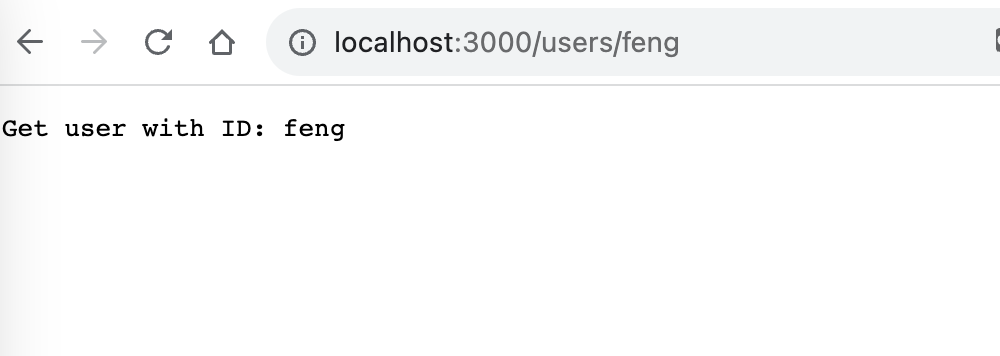
@get('/:id')
async getUserById(ctx: Koa.ParameterizedContext<any, Router.IRouterParamContext<any, {}>, any>) {
const userId = ctx.params.id;
// 处理获取指定用户的逻辑
ctx.body = `Get user with ID: ${userId}`;
}
}
// 注册路由中间件
app.use(router.routes());
// 启动服务器
app.listen(3000, () => {
console.log('Server is running on port 3000');
});
我们可以通过装饰器将路由的注册边得非常方便(现在流行的支持装饰器的Web应用并不是这么简单实现的,这里只是个demo)。
属性装饰器
属性装饰器的函数签名为
type PropertyDecorator = (target: Object, propertyKey: string | symbol) => void;
propertyKey是修饰的属性名,属性装饰器作用在实例成员和静态成员上时接收到的target参数是不一样的
function Custom() {
  return function (target: sany, propertyKey: string) {
    console.log('target is ', target);
    console.log('propertyKey is ', propertyKey);
  }
}

class Main {
  @Custom()
  custom;

  @Custom()
  static customStatic;
}

const main = new Main();
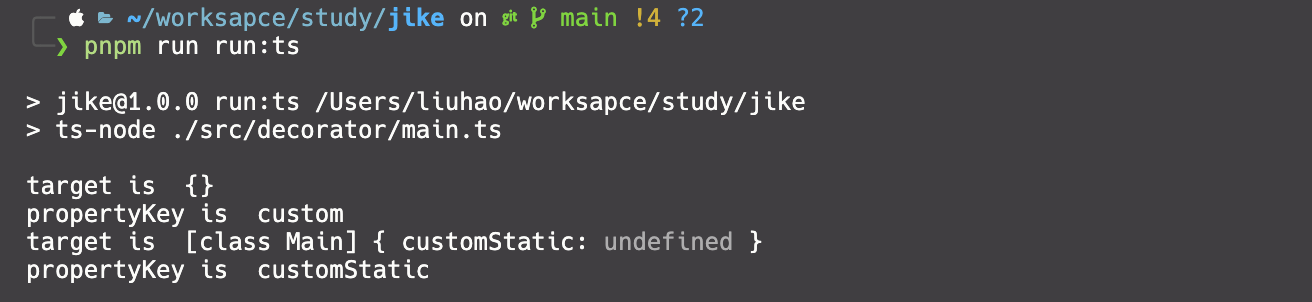
对于静态成员,是类的构造函数;对于实例成员,是类的原型。
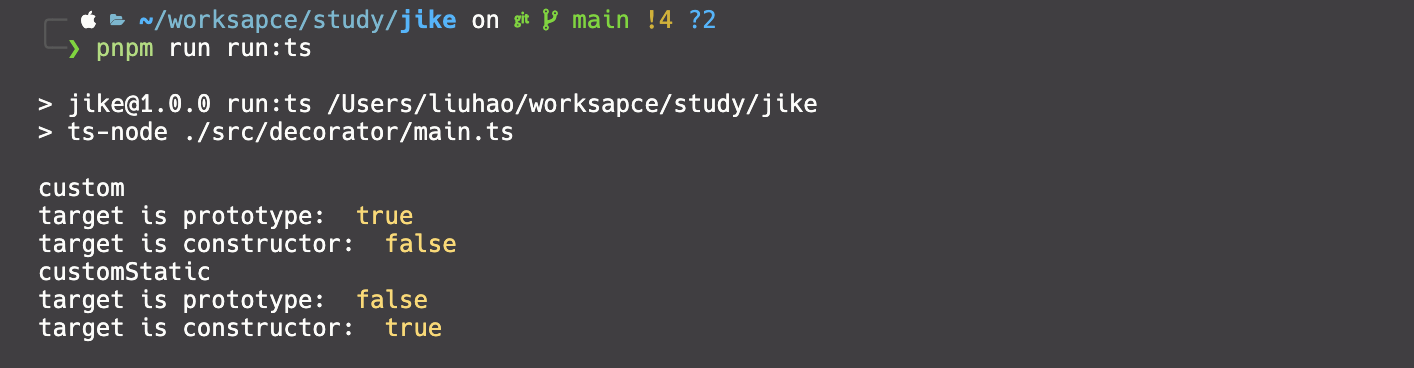
可能从上面的结果不太好看出,换种写法
function Custom() {
  return function (target: any, propertyKey: string) {
    console.log(propertyKey);

    console.log('target is prototype: ', target === Main.prototype);
    console.log('target is constructor: ', target === Main);
  }
}

class Main {
  @Custom()
  custom;

  @Custom()
  static customStatic;
}
结果如下
属性装饰器的应用主要用于依赖注入,我们简单模拟下⚠️真实场景不会这样处理,需要配置依赖注入容器完成,这里仅作示例
import 'reflect-metadata';
function Custom() {
return function (target: any, propertyKey: string) {
let type = Reflect.getMetadata("design:type", target, propertyKey);
Object.defineProperty(target, propertyKey, {
value: new type(),
})
}
}
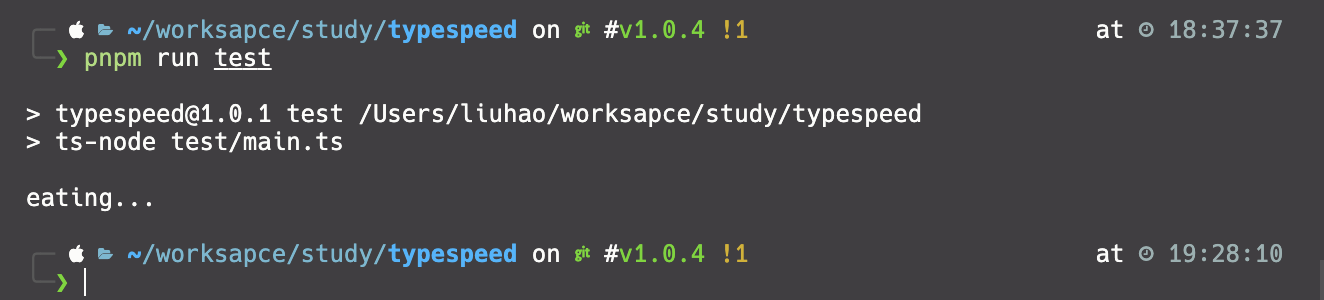
class AnimalService {
eat() {
console.log('eating...')
}
}
class Main {
@Custom()
custom: AnimalService;
main() {
this.custom.eat()
}
}
const main = new Main();
main.main();
首先需要安装 reflect-metadata依赖,通过反射API预设的metaDataKey来获取属性装饰器修饰的属性类型,然后对类实例化(真实场景不可能只有类作为类型,这里不展开)。
不推荐使用这种方式进行依赖注入,真正可行的依赖注入应该是通过属性装饰器、类装饰器配合依赖注入容器进行记录,当所需类实例化时根据记录的依赖进行动态注入。
方法装饰器
方法装饰器的函数签名如下
type MethodDecorator = <T>(target: Object, propertyKey: string | symbol, descriptor: TypedPropertyDescriptor<T>) => TypedPropertyDescriptor<T> | void;
方法装饰器的前两个参数和属性装饰器一样(target同样在静态方法和成员方法的值是不同的),第三个参数是方法的属性描述符,如果要修改被装饰的方法,需要修改 descriptor.value并返回descriptor。
function MethodDecorator(flag: string) {
return function (target: any, propertyKey: string, descriptor: PropertyDescriptor) {
const func = descriptor.value
descriptor.value = () => {
func()
console.log(flag, '---', propertyKey, ' run');
}
return descriptor
}
}
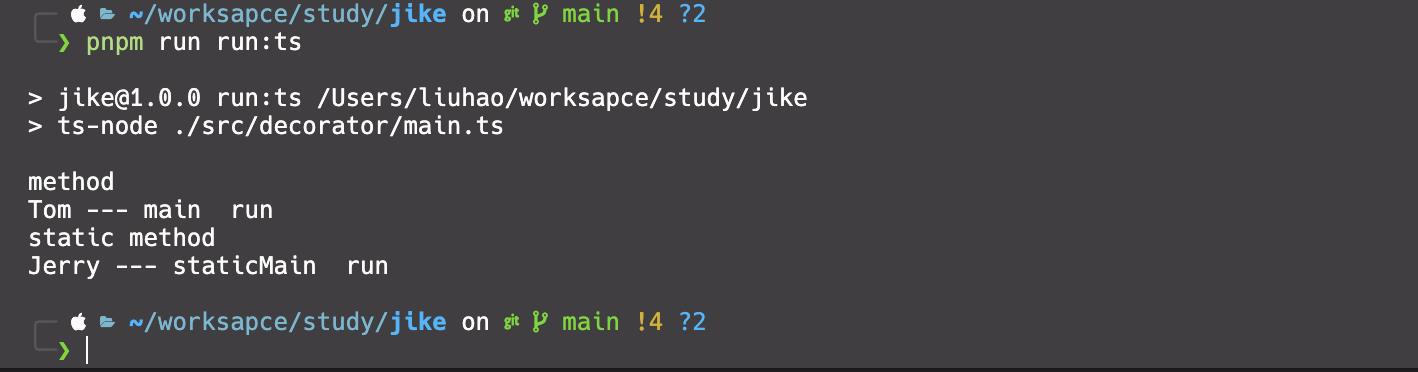
class Main {
@MethodDecorator('Tom')
main() {
console.log('method');
}
@MethodDecorator('Jerry')
static staticMain() {
console.log('static method');
}
}
const main = new Main();
main.main();
Main.staticMain();
方法装饰器的应用在前面类装饰器的时候用到过,用来控制路由,实际上在真实场景中,这要是方法装饰器最主要的用途。
参数装饰器
参数装饰器的函数签名如下
type ParameterDecorator = (target: Object, propertyKey: string | symbol, parameterIndex: number) => void;
第一个参数仍然是跟之前的属性装饰器一样,如果参数装饰器是用在静态方法的参数中target是构造函数,如果是用在成员方法的参数中则target为原型对象;第二个参数是方法名;第三个参数是装饰器所在方法的参数的索引。
class Main {
  main(@ParameterDecorator msg: string) {
    console.log('method: ', msg);
  }

  static staticMain(@ParameterDecorator msg: string) {
    console.log('static method: ', msg);
  }
}

const main = new Main();
main.main('hello parameter');
Main.staticMain('hello static parameter');
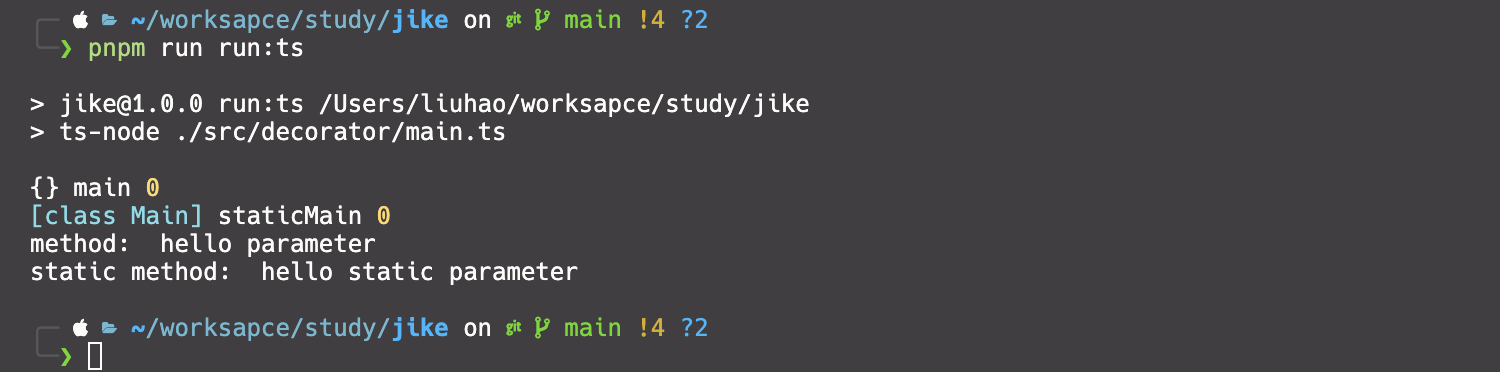
参数装饰器应用场景有限,可用于记录方法的参数位置,在调用目标方法的时候注入对应的参数。
执行时机
各种装饰器的执行顺序是:参数装饰器-方法装饰器/属性装饰器-类装饰器。
function OnClass() {
  console.log('exec class decorator factory');
  return function (target: { new (...args: any[]): {} }) {
    console.log('exec class decorator')
  }
}

function OnMethod() {
  console.log('exec method decorator factory');
  return function (target: any, propertyKey: string, descriptor: PropertyDescriptor) {
    console.log('exec method decorator')
  }
}

function OnProperty(msg) {
  console.log('exec property decorator factory: ', msg);
  return function (target: any, propertyKey: string) {
    console.log('exec property decorator')
  }
}

function OnParam() {
  console.log('exec param decorator factory');
  return function (target: any, propertyKey: string, index: number) {
    console.log('exec param decorator')
  }
}

@OnClass()
class MyClass {
  @OnProperty('property decorator1')
  property: string;

  @OnMethod()
  method(@OnParam() msg: string) {
    console.log('method run, received msg: ', msg);
  }
}

const myClass = new MyClass();
myClass.method('hello');
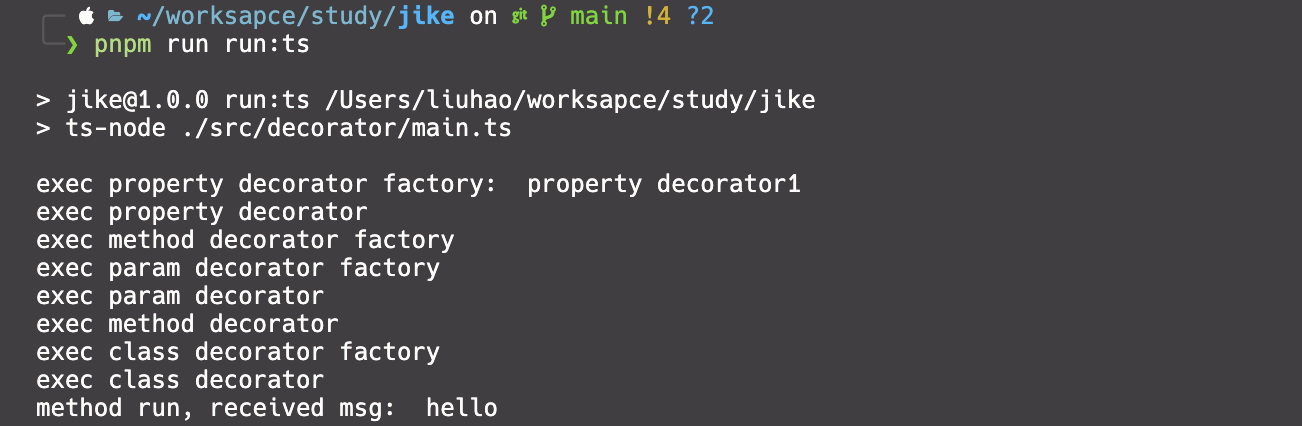
将上述代码中属性和方法的位置调换即可得到下面的结果
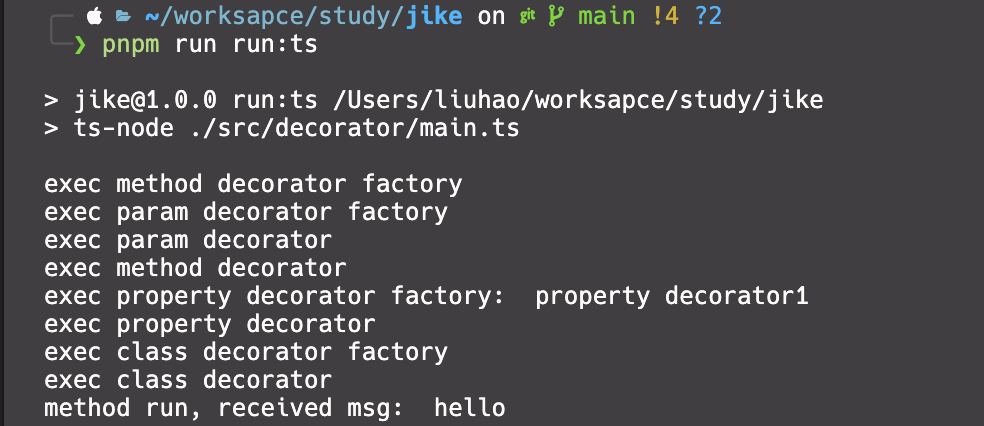
可以看出,参数装饰器和方法装饰器是绑定成组的,如果被修饰的方法中使用了参数装饰器,则先执行参数装饰器,另外属性装饰器和方法装饰器优先级相同,谁在前面谁先执行。
Reflect Metadata
Reflect 是一个ES内置的对象,它提供了一组与元编程相关的方法。Reflect 对象中的方法可以用于在运行时操作对象的属性、方法和原型链,文档地址。
元编程(Metaprogramming)是指编写能够操作或生成其他程序的程序。它是一种在运行时操作程序本身的能力,通过编程来创建、修改和分析程序的结构和行为。
元编程的目标是以程序作为数据来进行编程,使程序能够自我描述和自我修改。通过元编程,我们可以动态地生成代码、修改现有代码的行为,甚至在运行时根据需要创建新的程序逻辑。
除了ES内置的Reflect API,还有可以通过拓展包reflect-metadata来增强元编程能力(上面已经有过相关的代码示例了),安装之后可以拓展Reflect的API(需要在 tsconfig.json 里打开 emitDecoratorMetadata 选项)。
// 定义对象或属性的元数据
Reflect.defineMetadata(metadataKey, metadataValue, target);
Reflect.defineMetadata(metadataKey, metadataValue, target, propertyKey);

// 检查对象或属性的原型链上是否存在元数据键
let result = Reflect.hasMetadata(metadataKey, target);
let result = Reflect.hasMetadata(metadataKey, target, propertyKey);

// 检查对象或属性是否存在自己的元数据键
let result = Reflect.hasOwnMetadata(metadataKey, target);
let result = Reflect.hasOwnMetadata(metadataKey, target, propertyKey);

// 获取对象或属性原型链上元数据键的元数据值
let result = Reflect.getMetadata(metadataKey, target);
let result = Reflect.getMetadata(metadataKey, target, propertyKey);

// 获取对象或属性自己的元数据键的元数据值
let result = Reflect.getOwnMetadata(metadataKey, target);
let result = Reflect.getOwnMetadata(metadataKey, target, propertyKey);

// 获取对象或属性的原型链上的所有元数据键
let result = Reflect.getMetadataKeys(target);
let result = Reflect.getMetadataKeys(target, propertyKey);

// 获取对象或属性的所有自己的元数据键
let result = Reflect.getOwnMetadataKeys(target);
let result = Reflect.getOwnMetadataKeys(target, propertyKey);

// 从对象或属性中删除元数据
let result = Reflect.deleteMetadata(metadataKey, target);
let result = Reflect.deleteMetadata(metadataKey, target, propertyKey);
在使用Reflect.getMetadata时,可以使用内置的三个metaDataKey:
- design:type:获取target函数类型;
- design:paramtypes: 获取target函数参数类型;
- design:returntype:获取target函数返回值类型;