
同样,这一次我们只讲原理,如果你还不会Vuex的使用,简易移步官网

任务分析
先来根据Vuex的流程图来看一下我们需要做什么
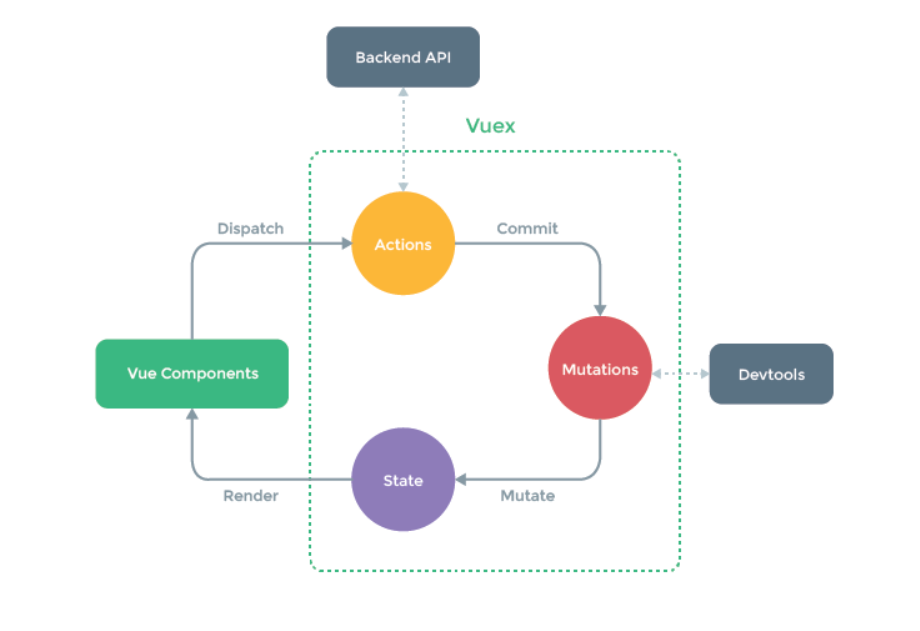
- vuex也是一个插件
- 实现四个东西:state/mutations/actions/getters
- 创建Store
- 数据响应式
插件
关于插件这里同样不多说,不会的请移步官网,这里依旧贴一张图
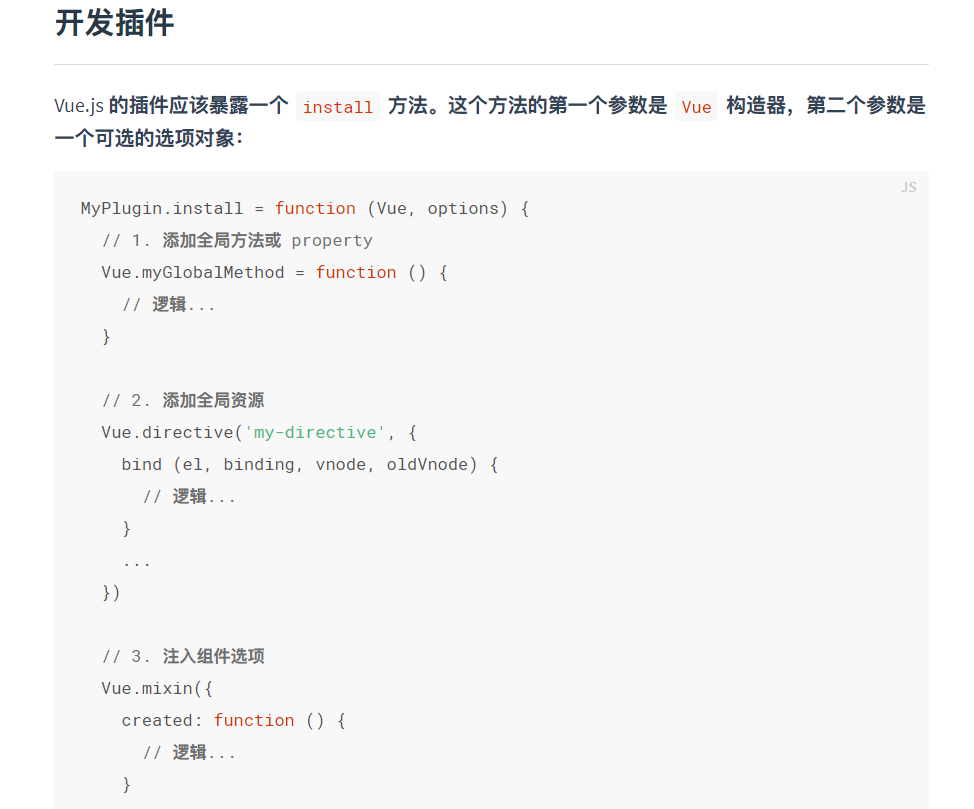
在安装插件时,通过Vue.use触发插件的install方法
function install(_Vue) {
  Vue = _Vue
  Vue.mixin({
    beforeCreate() {
      // 只有根元素才有store
      if (this.$options.store) {
        Vue.prototype.$store = this.$options.store
      }
    }
  })
}
这里注意只有第一次调用时才给元素添加store,也就是根节点
四个核心
首先要有一个可实例化的Store类,这点官网给的实例可以看出来
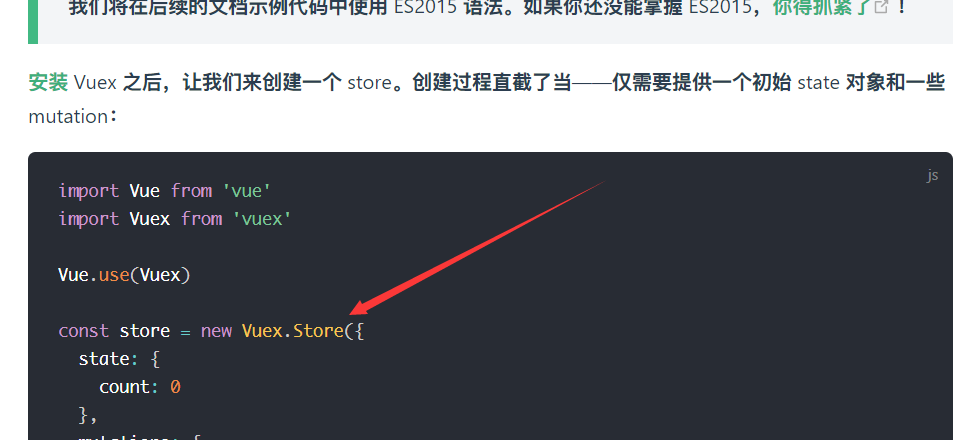
那我们就先创建一个Store类,它接收一个配置对象
class Store {
  constructor(options) {
    this.state = new Vue({
      data() {
        return { ...options.state}
      }
    })
    this.mutations = options.mutations
    this.actions = options.actions
    options.getters && this.handleGetters(options.getters)
  }
}
state负责存储数据,借用Vue实例来实现响应式;mutations用来存储改变state的方法;actions用来存储异步方法,这里注意actions本身并不具备异步特性,仅作为异步方法的容器,他可以调用mutations中的方法;getters可以用来读取state的内容,将结果处理返回
class Store {
  constructor(options) {
    this.state = new Vue({
      data() {
        return { ...options.state}
      }
    })
    this.mutations = options.mutations
    this.actions = options.actions
    options.getters && this.handleGetters(options.getters)
  }

  commit = (type, args) => {
    this.mutations[type](this.state, args)
  }

  dispatch = (type, args) => {
    this.actions[type]({
      commit: this.commit,
      state: this.state
    }, args)
  }
  handleGetters(getters) {
    this.getters = {}
    Object.keys(getters).forEach(key => {
      Object.defineProperty(this.getters, key, {
        get: () => {
          return getters[key](this.state)
        }
      })
    })
  }
}
测试
现在我们已经实现了一个简易版的Vuex,我们接下来进行一下测试
新建一个store.js,用来实例化store
Vue.use(Vuex)

export default new Vuex.Store({
  state: {
    count: 0
  },
  mutations: {
    add(state) {
      state.count++
    }
  },
  actions: {
    addAsync({ commit }) {
      setTimeout(() => {
        commit('add')
      }, 1000)
    }
  },
  getters: {
    getCount(state) {
      return state.count
    }
  }
})
在main.js中引入store
import store from './store'

new Vue({
  store,
  router,
  render: h => h(App),
}).$mount('#app')
编写Vue组件,调用Vuex方法
<div>
  {{$store.getters.getCount}}
  <br />
  <button @click="$store.commit('add')">同步+1</button>
  <button @click="$store.dispatch('addAsync')">延时+1</button>
</div>
测试结果如下